Monday, September 30, 2013

Rainbow Cake Bites

This was originally meant to be just a rainbow cake, but the cake was not cool enough before it was taken out of the pan so it turned into Rainbow Cake Bites!

Ingredients

1 box of extra moist white cake mix
1 1/4 cups of water
3 egg whites (not important, I used 2 eggs)
1/3 vegetable oil

Instructions

You'll mostly follow the instructions on the cake box, but I'll write them here anyway.
1.  Preheat your oven to 350 degrees Fahrenheit. Grease your pan, or pans, generously. 
2.  In a large bowl, combine the cake mix, water, eggs, and oil.
3.  Our the cake mix into 6 bowls evenly.
4. Using food coloring, make the batter a different color in each bowl.  I used red, orange, yellow, green, blue, and purple.
5.  Pour the mix into your cake pan in the order of the rainbow.
6.  Bake the cake for the appropriate amount of time based on the chart below..

Two 8” round layers
35 – 40 min
Two 9” round layers
30 – 35 min
One 13” x 9” pan
35 – 40 min
One 10” or fluted tube pan
45 – 55 min
24 – 30 cupcakes (1/2 full)
20 – 25 min


Cool cake in pan for 10 to 20 minutes, when removed from pan cool the cake topside up.  After the cake is completely cooled you can frost and decorate it.  

I cooked this with a friend, and we didn't let the cake cool long enough.  This is what happened.


Awkward.


So to improvise we cut it into pieces and made Rainbow Cake Bites.
They were still just as good and were almost easier to eat than actual pieces of cake.  And you could choose if you wanted frosting or not, whatever you liked. One modification my friend and I made was we used 2 entire eggs, not just egg whites.  We wanted a bit more flavor in our cake and it worked really well.Enjoy!!

Crepes

I said in my About Me post that some French recipes would make their way onto my blog.  The first was Langues de Chat, and now I've made crepes!  These are shockingly easy to make and taste really good.  Once again, I made these with a friend for breakfast and they didn't take long at all either.  These also taste really good if you put nutella on them, for all you chocolate-lovers.  So, without further ado, here's the recipe!

Ingredients

3 eggs
1 1/2 cups of milk
1 cup plus 2 tbsp. of flour
1 tbsp. of sugar
1/4 tsp. salt
2 tbsp. melted butter

Instructions

1.  Mix all the ingredients in a medium bowl with a whisk.  Make sure to get everything off of the sides.  The original recipe says to refrigerate the batter for about 30 minutes, but it makes no difference.  My friend and I didn't refrigerate it at all.
2.  Grease a pan that is over medium heat.
3.  Pour about 1/3 of a cup of batter into the pan.  Wait about 45 seconds, then flip the crepe.  Lightly move the spatula around the edges of the crepe, then flip it quickly.
4.  Wait about thirty more seconds, then flip the finished crepe onto a plate.  Repeat until the batter is gone or you are happy with the number of crepes you have.  Extra batter can be refrigerated to save for another day.

My friend's favorite way to eat a crepe is with nutella and a banana, cut up or whole.  I like to eat them with nutella, peanut butter, or plain since they taste good anyway.  Other fillings include, but are not limited to, mini-chocolate chips, jam, cream cheese, ice cream, fruit like peaches and strawberries, and honey.  Everyone likes their crepes a different way, there is no right way to fill it.

Now I'll put in a picture explanation of cooking and flipping a crepe.

This is what the crepe will look like when it is ready to flip.  There will most likely not be as much brown though.

Slide the spatula around the edge to loosen up the crepe, then flip it quickly.


This is what the first side of the crepe will look like.  It looks a lot like a really flat pancake, because that's essentially what it is.


 Wait for about thirty more seconds, then flip the crepe onto a plate.


This is what the other side of the crepe will look like.  This side looks kind of like eggs to me.

Here's a more direct picture of the crepe batter when you first pour it into the pan.


If you are worried about not being able to flip the crepe, it's actually REALLY easy.  All you have to do is flip it like a pancake and you've got it!  Also, make sure you loosen up the edges, it may not sound important, but it definitely makes the whole process easier.

I hope you enjoy this simple recipe, it's really good!

Bon Appetit!!

Monday, September 23, 2013

Cinnamon Crescent Rolls

I've made this recipe multiple times and it's always received well.  It's like a modified cinnamon roll that is way easier to make than homemade cinnamon rolls.

Ingredients

1 Tube of Pillsbury Crescent Rolls

Filling:

5 tablespoons of butter
1/4 cup of white sugar
2  1/2 teaspoons of cinnamon

Glaze:

2 tablespoons of butter, melted
1/4 cup and 2 tablespoons of powdered sugar
1/2 teaspoon of vanilla

Instructions

1.  Preheat your oven to 375℉
2.  Unroll the crescent rolls onto a cookie sheet, do not grease it.
3.  Now you make the filling: mix the butter, sugar, and cinnamon in a small bowl.
4.  Spread the filling out onto the crescent rolls evenly, then roll them up.
5.  Bake the crescent rolls for 10 to 12 minutes
6.  While the crescents are cooking, you can make the glaze.  Mix the butter, powdered sugar, and vanilla.  The original recipe says to put the glaze in a plastic bag to drizzle it on, but its easier to just spoon it onto the crescent rolls.  Also, the recipe for this glaze is really flexible, if it isn't runny enough for your preferences you can add milk, about a teaspoon at a time.  Going the other way, more powdered sugar can be added to thicken up the glaze.

While these are in the oven some cinnamon filling will ooze out of the crescent, but that's expected.  These can also be stored in an air tight container, but they only taste the best on the first day they're made, especially when they are right out of the oven.

Since, I don't have any pictures, I'll provide the link to the blog where I found this since my pictures would have been essentially the same as hers.

In the past when I've made this it's always been really simple and all the ingredients are almost always around the house somewhere.  When I make for my siblings I typically have to make a double batch!

Enjoy!!

Sunday, September 22, 2013

"Other" Posts

Looking ahead at my schedule for the next month or so, I can already tell you that I won't be able to make a new recipe every week, let alone two.  So, I've been brainstorming some other types of posts I could do and thinking of different topics for my posts.

So far, I've come up with these:

  • Baking Tips
    • This could include baking conversions, tips and tricks with popular recipes, or even little things I've noticed and try to do or avoid when baking
  • Sharing recipes that I know so well I don't have to actually make them
    • This is basically what I did with my most recent post about the Almond Bark Chex Mix, the only difference is my mom made it so I had a picture to use.  These posts most likely wouldn't have pictures, but this way I would still be sharing recipes.
  • Giving weekly updates on the types of recipes I'm loving that week
    • This type of post would basically be about the kinds of things I've been pinning since I seem to be addicted to the Food & Drink section of Pinterest.  I would share these recipes as well, but I wouldn't be able to provide my opinion and tips that I have since I most likely wouldn't have time to make it.


I'm hoping to still be able to make new recipes at least every two weeks, but we'll see what I can do.

If you have any other ideas, let me know and I'll see what I can do. :)

Almond Bark Chex Mix


Chex mix, trail mix, call it what you will, is always better when coated with some sugary substance.  This is a simple snack that can be made whenever and is appropriate for any occasion.  Essentially all you have to be able to do make this recipe is measure things out and melt almond bark.  Simple.

Ingredients

1 lb of white almond bark (1 package)
1 10 - 12oz bag of pretzels sticks
1 2 lb bag of M&M's
5 cups of Chex Cereal
5 cups of Plain Cheerios

Instructions

1.  Measure out all the dry ingredients into the biggest bowl you can find.
2.  Set out wax paper on the counter for later.
3.  Microwave the almond bark for one minute the first time, then in 15 to 30 second intervals after.  When you stir the almond bark, use a metal spoon.
4.  After the almond bark is smooth, pour it over the dry ingredients and stir with a rubber spatula until everything is coated evenly.
5.  Spread the mix out over the wax paper to set.

I have one major tip for this recipe: whatever you do, DO NOT POUR EXTRA ALMOND BARK DOWN THE SINK! It will harden up in the drain and it takes forever to melt/break it all to clear up the drain.  Another, less important, tip is to definitely use pretzel sticks.  If you use the regular loopy ones then the M&M's and such will get stuck in the holes of the pretzel.

Also, this recipe is not set in stone, it can be changed to fit your tastes if you so choose.

Enjoy!!

Monday, September 16, 2013

Langues de Chat


The name of this recipe, Langues de Chat, technically translates to...cat tongues...BUT! That's only because of the texture and thinness of the cookie, they're actually really good, I promise!  I made these for Cercle de Français (French Club) this week because this is a French recipe, obviously.

Here's the original recipe:

Ingredients

1/4 cup (1/2 stick) unsalted butter, room temperature
1/4 cup sugar
1/2 teaspoon grated lemon peel
1/2 teaspoon vanilla extract
1/4 cup egg whites (about 2 large)
6 tablespoons all purpose flour
Pinch of salt

 Instructions

Preheat oven to 350°F. Butter 2 large baking sheets, VERY LIGHTLY. Using electric mixer, beat butter and sugar in medium bowl until well blended. Beat in lemon peel and vanilla . Add egg whites and beat  30 seconds. Add flour and salt; beat  just until blended
 Spoon batter into pastry bag fitted with 1/3-inch plain round tip Pipe batter onto baking sheets in 2 1/2-inch-long strips, spacing 2 inches apart. Bake until edges are golden, about 10 minutes. Transfer cookies to racks; cool (cookies will crisp as they cool). (Can be made 2 days ahead. Store airtight at room temperature.).


I definitely modified this recipe, the first batch of dough flattened out to the the thinness of paper after about a minute.  It literally looked like melted butter that had been left to sit out.  I made a second batch, but this time I halved the amount of butter and used nine tablespoons of flour.  This thickened the batter enough that it was able to hold its shape.


First Batch: Batter
Second Batch: Batter

First Batch
Second Batch


After Adding Egg Whites
Another modification I made was to cook the cookies for a much shorter time.  I only cooked them for about seven minutes maximum, and five minutes minimum.

Also, I didn't use an electric mixer at all.  I used a spatula most of the time with a whisk when I added the egg white.  Instead of a pastry bag I used a quart-sized zip-lock bag and cut a small hole in the corner.

The second batch DEFINITELY turned out better. I will copy a modified recipe below the rest of this post.

After all the cookies had cooled, I melted a bag of semi-sweet chocolate chips and used a cake decorator tool to apply the chocolate.  These cookies are sometimes dipped into chocolate, but I feel like that would have been too much chocolate and it would have overpowered the rest of the cookie.


Modified Recipe

Ingredients

1/8 cup unsalted butter, room temperature (salted is fine too)
1/4 cup sugar
1/2 teaspoon grated lemon peel
1/2 teaspoon vanilla extract
1/4 cup egg whites (about 2 large)
9 tablespoons all purpose flour
Pinch of salt

Instructions

Sugar, Butter, Vanilla, and Lemon Zest
Preheat oven to 350°F. Butter 2 large baking sheets, VERY LIGHTLY. Mix the butter and sugar with a rubber spatula.  Mix in lemon peel and vanilla . Add egg whites and beat with a whisk. Add flour and salt; whisk until blended

Spoon batter into plastic bag and cut a hole 1/3 of an inch across in one corner. Pipe batter onto baking sheets in 2 1/2-inch-long strips, spacing 2 inches apart. Don't put put more than seven cookies on at a time.  Bake until edges are golden, about 5 - 7 minutes. Transfer cookies to racks; cool (cookies will crisp as they cool).

Melt about one fourth to one half of a bag of chocolate chips in a small bowl.  Heat them in 30 second intervals, stirring after each until the chocolate is smooth.  Using a spoon, put the chocolate into a cake decorator and decorate the cookies.  Let the chocolate set at room temperature, or in a refrigerator to quicken the process, and you're done!

Saturday, September 14, 2013

The Best Scotcheroos I've Ever Had

This is, by far, my favorite Scotcheroo recipe I've ever used.  It is my go-to recipe when I need to bring a desert to a party because it's very simple and takes about a half hour to make.  I found it on the internet a while (or a few years) back after I decided to find the best Scotcheroo recipe out there, so I can't credit the original baker.

Ingredients:

1 cup of sugar
1 cup of light corn syrup
1 cup of peanut butter
1 tsp. of vanilla
6 cups of Rice Krispies Cereal
1 1/2 cups of semi-sweet chocolate chips
1 1/2 cups of butterscotch chips

Instructions:

So here's the instructions that come with the recipe, I'll explain my way of doing it after.

1.      Line a 13×9 inch pan with foil and spray with cooking spray.
2.      In a very large saucepan, combine sugar and corn syrup. Heat just until bubbly.
3.      Remove from heat and stir in peanut butter and vanilla. Stir until well blended; Stir in cereal.
4.      Place chocolate and butterscotch chips in a microwave-safe bowl and heat on high until melted, stirring every 30 seconds. Spread melted morsels over top of cookies.
5.      Refrigerate until chocolate is slightly firm, then lift foil from pan and place on a cutting board. Cut into 3-4 dozen bars.
6.      Makes 3 dozen bars

Note: Alternatively, you may mix the sugar, corn syrup and peanut butter in a microwave-safe bowl; microwave it all on high for 2 minutes – stopping every 30 seconds to stir. Then stir in the vanilla and the Special K.

So now my version:

1.  First I line a 13 by 9 inch pan with aluminum foil then spray it with cooking spray.
2.  Then, I measure out the 6 cups of cereal into the biggest bowl I have, it's a super large aluminum bowl.
3.  After that I put the corn syrup, sugar, and peanut butter into a medium sized bowl and follow the note at the bottom of the original directions.  This is also where I tend to mess up.  I often forget to add the vanilla in after I finish mixing, but it really doesn't make a difference in the end product.
4.  Once I finish mixing I pour the sugary-peanut buttery-goodness into the cereal and mix it up with a rubber spatula.  The peanut butter mixture doesn't harden up as quickly as you would think, but it is still good to coat all of the cereal as soon as possible.
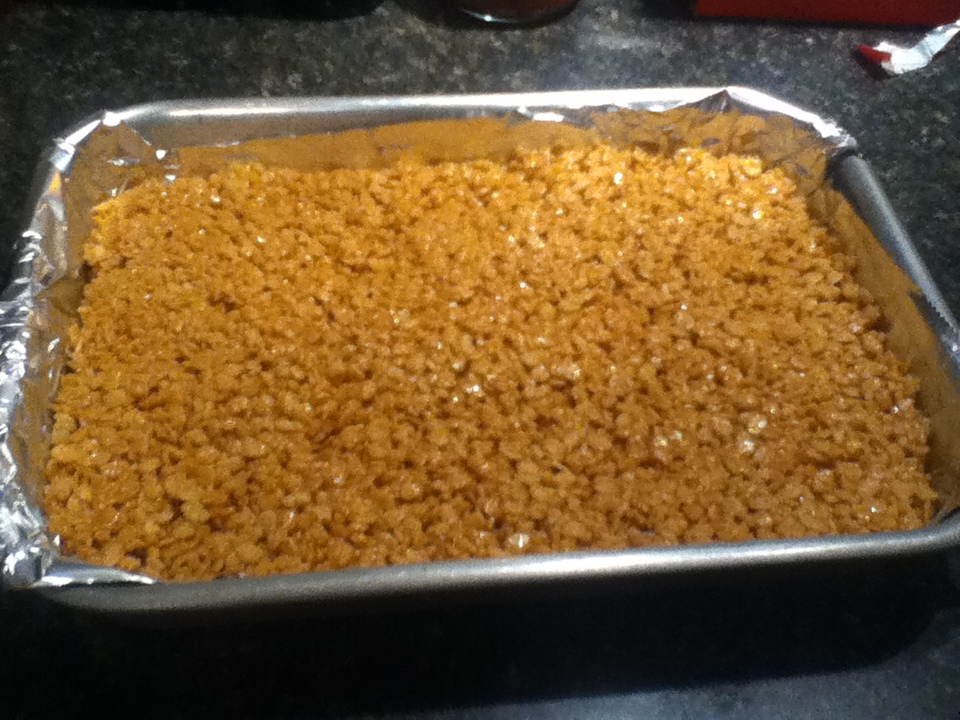
5.  When all the cereal is coated, pour it into the pan and spread it out so that the top is as flat and even as possible.
6.  Now for the chocolate top.  The recipe says to only use 1 1/2 cups of each type of chip, but I say go for gold and use the entire bag of each.  Make sure you use a large-ish bowl for this, it gets a bit messy when stirring.
7.  Microwave the chocolate/butterscotch chips for 30 second intervals, stirring between each, until there are no lumps left and the mixture is smooth.  Pour it over the Rice Krispies and even it out as much as possible.

My Tips:

-Refrigerate the Sctocheroos for an entire night.  It makes them easier to cut (as long as you use a large knife) and they aren't as messy when you eat them.
-When you line the pan with aluminum foil, make it about two to three inches longer than necessary, the ends can be used to pull the entire pan of Scotcheroos out at once and that makes it easier to cut as well.
-Don't bother buying name brand Rice Krispies Cereal or Nestle Chocolate Chips.  I buy bargain brand everything because it works just as well and it's cheaper. :)

Hope you enjoy this simple recipe!!!
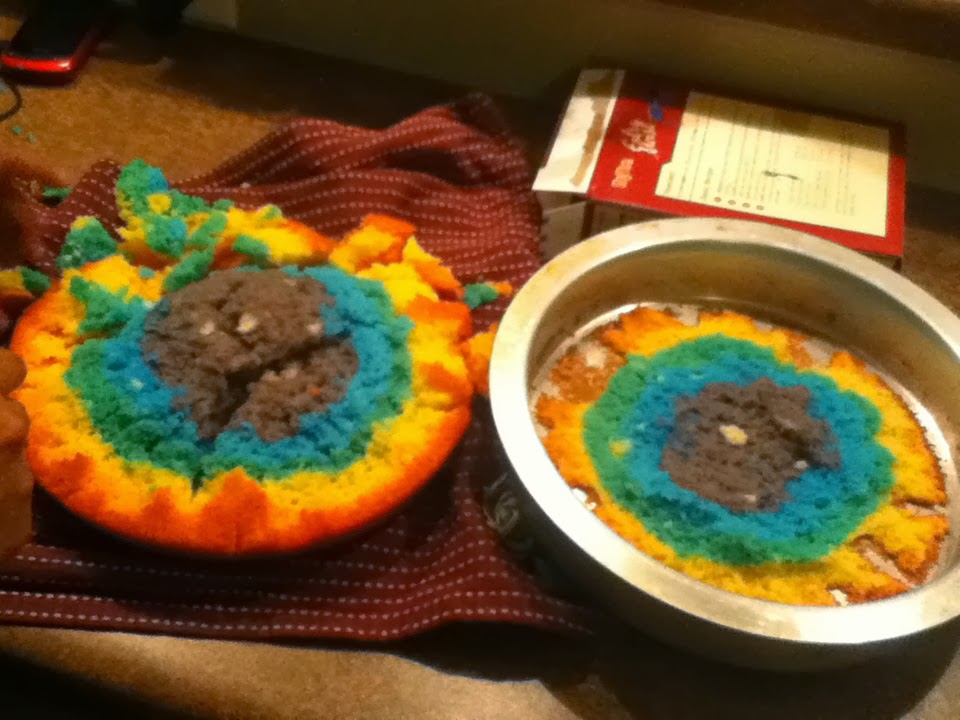
Tuesday, September 10, 2013

Berry Medley Smoothie

Since soccer is such a huge part of my life, I practice a lot and do some sort of exercise almost every day.  Constant workouts means I need to keep my body in good condition with food that is good for me too.  This is a smoothie that I typically make about an hour before I plan to workout, or right after, because it has all of the nutrients needed and some protein powder to strengthen my muscles and replace the nutrients and protein I lost during the workout.  It can also substitute as a breakfast if I'm in a rush because it only takes about ten minutes to get everything out, make the smoothie, and put the ingredients away.

This recipe was given to me by a girl on my soccer team.

image.jpeg
Berry Medley Smoothie

1/3 cup of Genesis Today Pomegranate and Berries Juice
1/3 cup of Genesis Today Acai Berry Juice
1/3 cup of Lifeway Kefir Probiotic Cultured Milk Smoothie
1 Banana
About a handful of frozen fruit
Vanilla Protein Powder - 100% Whey Protein
Ice

image.jpeg

Put all the ingredients, except ice, into the blender and blend on high until the it's very smooth.  This is where the ice comes in.  I prefer thicker smoothies, so I add ice to thicken it up since the smoothie is normally very runny.  I typically use about 5 - 10 ice cubes depending on how quickly it thickens.

This usually makes one 16 oz smoothie, but can make two thicker smoothies if more ice is added than usual.

image.jpegI've only been able to find the Genesis Today juices at Walmart, although I'm sure there's another store that has it somewhere.  I get my protein powder and Lifeway Kefir Smoothie at Hy-Vee in the organic section.  They have multiple flavors but normally I use strawberry or strawberry-banana.
image.jpeg

To be honest I don't always follow the exact measurements, I just use what looks right.  I don't always use the same types of fruit either.  Normally I buy the Berry Medley (hence the name) frozen fruit because it has blueberries, strawberries, etc., but I've also used a tropical mix of frozen fruit, like pineapples and mangoes, and added Mighty Mango Naked Juice to the smoothie.

BUUUYYYYEEEEE