Monday, December 16, 2013

Homemade Caramelly, Chocolaty, Coconutty Goodness. AKA Homemade Samoas.


Girl Scout cookies, whatever your preferences, are delicious.  They're a necessary supply in pantries throughout the US.  Unfortunately they're only available to order for a very short time.  My personal favorites are the caramelly, chocolaty, coconutty goodness that are Samoas.  Pinterest graced me with this recipe, and I'm sure you could find other homemade recipes for all your Girl Scout cravings.

I will put the ingredients for the cookie dough here, but I will add a link to the actual recipe and the how-to here, this part of the blog post-pair is going to have the recipe customized to Homemade Girl Scout Samoas.

Ingredients

Cookie Dough:
1 cup (2 sticks) unsalted butter, at room temperature
1/2 cup sugar
2 cups all-purpose flour
1/4 teaspoon baking powder
1/2 teaspoon salt
2 Tablespoons milk
1/2 teaspoon vanilla extract

Caramel Coconut Topping:
3 cups shredded sweetened coconut
15 ounces soft caramels
3 Tablespoons milk
1/4 teaspoon salt
8 ounces dark chocolate

Instructions:

Cookies:
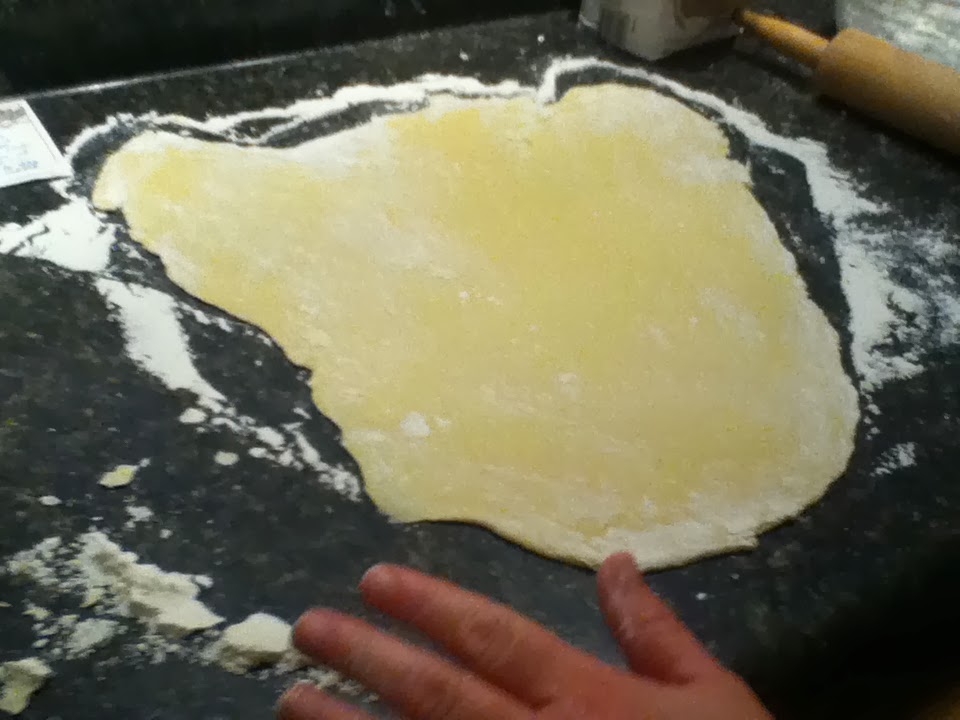
Follow the linked recipe.  When you roll the dough out cut it using a two-inch cutter, then cut out the centers using a one-inch cutter.

Bake the cookies for ten minutes on a parchment paper-lined baking sheet, rotating them half of the way through.  Set the finished cookies on a wire rack to cool.

Coconut Topping:
Distribute the coconut evenly onto a baking sheet lined with parchment paper.  Bake the coconut until toasted and is a golden brown, ten minutes maximum.  Flip and stir the coconut frequently to avoid burning, typically every two minutes.

Melt the caramels in a double boiler, then add the milk and salt.  You can also microwave the caramels, its much faster and works just as well.  When you add the milk it's going to seem very runny, but add the salt and it gets a lot better.

The next part is where I forged my own way, kind of.  The original recipe said to add the caramel to the coconut then put it on top of the cookies, but I put caramel on top of the cookies first then added the leftover caramel to the coconut.

Put the caramel-covered coconut onto the cookies, this is an extremely messy part.  I couldn't find any other way to do it other than use my hands, it stuck to the spoon, a knife isn't exact enough, just endure the mess and use your fingers.  I was unable to cover all the cookies with coconut, although that was probably due to the amount of coconut I put on each cookie initially.

Allow the cookies to cool for at least a half hour, I left them overnight because it was 10:30 by the time I finished this part and I had other things to do.

Melt the chocolate in a double-boiler, or, again, the microwave.  Dip the bottoms of the cookies in the chocolate (use a knife to wipe excess chocolate off), and place the cookies onto wax paper to allow the chocolate to set.  To apply the chocolate stripes I put melted chocolate into a cake decorator and squeezed it out as I went.  This is the same technique I used on the Langues de Chat.


Allow the chocolate to harden fully then enjoy!  If you need to quicken this process then the cookies can go in the refrigerator.

Tips:
~ When melting the caramel, melt all of the caramels in one bowl at the same time, then add the milk and salt when the caramel is smooth.
~ For the chocolate, chocolate chips are perfectly fine.  I recommend dark chocolate.
~ Whenever I say wax or parchment paper, I used aluminum foil.  It turned out I didn't have any wax or parchment paper at my house, so if you don't it's not the end of the world.

Cookie Dough

The entire post of Homemade Samoas is going to be divided into the cookie dough and customizing the dough for the Samoas.  This cookie dough can be used for other recipes, its kind of a shortbread recipe, so I will make the cookie dough alone here, then make the Samoas on another blog post.

So this cookie dough kind of has the qualities of a shortbread, although I would not eat it alone.  Some type of topping should definitely be added to add some flavor because alone, the cookie is bland.

Ingredients:

1 cup (2 sticks) unsalted butter, at room temperature
1/2 cup sugar
2 cups all-purpose flour
1/4 teaspoon baking powder
1/2 teaspoon salt
2 Tablespoons milk
1/2 teaspoon vanilla extract

Instructions:

Preheat the oven to 350 degrees Fahrenheit.

With an electric mixture, cream together the butter and sugar until light and fluffy in a large bowl.  You will add the dry ingredients to this bowl so make sure your bowl is large enough to accommodate that.

Mix together the flour, baking powder and salt in a medium-sized bowl.  Steadily add this mixture to the butter and sugar, mixing between additions.  Eventually it will be easier to use a rubber spatula or do it by hand.  I used the rubber spatula to mix in the flour completely.  Don't forget to scrape the sides of the bowl so that you get every little bit.  It should still be a little crumbly at this point, so don't worry if it is.

Add the milk and vanilla and mix with a rubber spatula, to completely combine the liquids.  This is the point where I used my hands to condense the dough into one big ball.

Divide the dough in half, and press it into two discs.  Cover the dough in plastic wrap and refrigerate the dough for about an hour.

After the dough is chilled you can roll it out and cut whatever shapes you want.  The dough should be about an eighth of an inch thick.


The cookies will take about 10 to 12 minutes to bake, about five minutes in rotate the cookie sheet to ensure even cooking.  When they're done the cookies will be a pale golden brown, cool them on a wire rack.


Notes:

~ It is important that the butter is room temperature, or at least thawed in the microwave.  If you do microwave the butter, do so in very small increments, five to seven seconds each time should do.
~ Allow the dough to thaw for about five minutes after being refrigerated, it'll be easier to roll out.

Sunday, December 8, 2013

Pillsbury Doughnut Bites


Everyone loves sugary snacks, especially when they're easy to make!  Doughnuts are deliciously amazing, but they can get complicated, doughnut bites or doughnut holes are easier.  The easiest and fastest way to make them is to not even make your own dough, find something that's just as easy.  This is exactly what this recipe does.

Ingredients

Pillsbury Grands Biscuits
Cooking oil
Sugar

Instructions

1. Pour about an inch and a half to two inches of cooking oil into a medium saucepan.  Put it over medium heat.
2. Cut each biscuit into fourths (I ended up cutting them into eighths).
3. This part isn't necessary, but it always helps to have a good idea of how to organize your cooking area. Have a plate covered with paper towels ready to put the freshly fried doughnut bites on to cool.  Next to that, have a clean, uncovered plate to put the sugar covered doughnut bites on.  Put some sugar in a shallow bowl, I used Tupperware, near the plates.
4. Flick some water into the oil, if it crackles the oil is ready.
5. Just to make sure, make one doughnut bite to check the cooking time and to see if you need to increase or decrease your heat.  It should sizzle from the moment it touches the oil. The doughnut bite should be done in a one to three minutes.  If its ready, add as many doughnut bites as you want to make at once, just make sure it's manageable.  Flip the doughnut bite when it is golden brown.

6. Let the doughnut bite cool for about thirty seconds at the very least. Roll it in sugar then place on the uncovered plate.

The reason I cut the biscuits into eighths rather than fourths is because they were so big that they would cook unevenly and much too quickly to be cooked all the way through.  If you enjoy doughy doughnut bites, then by all means leave it in fourths, but if you're like me and prefer fully cooked ones, then eighths is probably the way to go.

These are simple to make and one package of Pillsbury Grand Biscuits goes a long way, I made about thirty!  They're also really filling, so you don't need many of them.

Happy Holidays and Enjoy!!

Turkey and Noodles


After having November off from blogging, I'm excited to start up again because it means I get to bake weekly again!  I don't know about anyone else, but my family has a ridiculous amount of turkey left over from Thanksgiving.  Instead of simply reheating and eating the turkey plain, my family incorporates it into multiple meals that we have perfected over the years.  One such recipe is our homemade noodles, the recipe originally didn't use turkey, but it's flexible and a way to get rid of the turkey so you might as well.  Also, my family tends to eat a lot of this recipe, so we double it whenever we make it.

Ingredients

2 egg yolks
4 tbsp. water
1 c. flour
1 tsp. baking powder
2 cups of chicken broth - must have salt added
Turkey (no specified amount)

Instructions

1. Separate the egg yolks and beat them in a medium to large sized bowl.


2. Add the water, beat again.
3. Add the flour and baking powder, then mix with a fork.


4. Put the dough onto a floured board and work in flour until stiff.  When we make this we just flour the counter top.
5. Roll the dough out thin and cut.  We make our noodles about an inch long and a centimeter wide, and our dough is typically about a fourth of an inch thick.  It's important to remember that the noodles will double or more in size as they absorb water, so don't make them too thick or long unless that's what you want.


6. The noodles can be stored in plastic bags and frozen if you want to save them for later, or they can be cooked immediately.
7. Cut the turkey into desired size.


8. Bring the broth to a boil in a large pot.
9. Once it's boiling, add the noodles, stirring constantly.
When they're first added
Five minutes later


10. Add the turkey and stir.  You won't be able to see the turkey at first because it sinks.
11. Bring it back to a boil after adding the noodles and turkey, boil it until you think they are done.  It's a very flexible recipe.

Let the noodles cool for a few minutes, and serve warm.  It can be made with turkey, chicken, beef, whatever meat you like.

My family typically makes these around Christmastime and in the winter so we use our special Christmas dishes.  We have a few bowl and plate sets and glasses that we use.


This is one of our bowl and plate sets.

 In the blog posts this coming month you will probably see these dishes and other Christmas-themed dishes as well, we like to use them while we can.

Happy Holidays and enjoy!