Monday, October 28, 2013

Roasted Pumpkin Seeds

Carving pumpkins has always been one of my favorite childhood memories.  The best part about it is getting to dig out the guts and seeds and make a mess with your parents permission, then they clean it up for you!  The only thing about it is, all the pumpkin seeds go to waste!  I remembered that in preschool I'd had roasted pumpkin seeds and loved them, so I thought I'd try to make them and see how they turn out.

So, this recipe is a compilation of all the recipes I saw, it doesn't have any real measurements, you can just throw the ingredients together, literally.

Ingredients

Pumpkin seeds
Salt
Seasonings (if you want them)

Instructions

1.  Carve a pumpkin.  This is the fun part. :) Make sure to save the seeds in a bowl separate from the rest of the guts.  It's alright if there is some guts in it, you'll get rid of that later.


2.  Rinse the seeds in a colander (strainer) to get the rest of the pumpkiny sludge off of them.


3.  Leave the seeds to sit out overnight on a cookie sheet so they dry out.  I ended up leaving the seeds out for a full 24 hours, mixing them up in the morning before I left the house and actually making them when I got home from school.

4.  Sprinkle salt and any other seasonings you'd like to the seeds.  I added salt and Tastefully Simple's Everyday Seasoning to give it an extra kick.
5.  Bake the seeds at 300 degrees farenheit for 35 minutes.  Stir the seeds after 20 minutes.  I also add a few more sprinkles of the Everyday Seasoning to the seeds once I stirred them.
6.  Let the seeds cool before eating.  Let them cool for at least 24 hours before storing so they don't become soft.

I ended up making about six cups of roasted seeds.  I was carving pumpkins with friends so I got six cups from six pumpkins.  This is a lot more seeds than it sounds like, so they will probably last my family a few weeks. The recipe turned out really well.  It is by no means set in stone, rather it's extremely flexible and can be changed to fit the tastes of almost anyone.  Salted pumpkin seeds isn't the only kind of roasted seeds either, there are also spicy, Italian, and sugary recipes among others.

Hopefully this gives you something to do with your seeds rather than just throw them away, Happy Early Halloween and enjoy!! :)

Rice Krispie Pumpkins

This is a fun recipe that is relatively simple to do.  I completely forgot to take pictures while making this recipe, but if you've ever  made rice krispie treats before, then it's really no different, just orange.

Ingredients

4 tablespoons of butter
1 bag of marshmallows
6 cups of rice crisp cereal

Instructions

Melt the butter over medium heat, then gradually add the marshmallows, stirring constantly.

When completely melted, remove the butter-marshmallow combination from heat and add the food coloring.  Pour the marshmallows over the rice krispies.

Stir the rice krispies to completely cover all of the cereal, if it is too sticky then allow them to cool or add some more cereal.  If it isn't sticky enough, then gradually add more melted marshmallow, but be careful not to add too much.

When the marshmallow-coated rice krispies are cooled enough and easy-ish to shape, form them into pumpkin-shaped balls.  Unwrap the tootsie rolls and put one on top of each pumpkin to represent the stem.

It is probably good to note that these are very sticky and it is easiest to place the 'pumpkins' on wax paper when they are done.  I couldn't find any wax paper and it was extremely hard to get them off the surface I set them on.


These are really fun for kids to make because it is an opportunity for them to get involved in the kitchen and also get their hands dirty.

Happy Early Halloween!! :)

P.S.  This post obviously didn't go up by Friday as planned, but it's up now!!  Also, I should have another recipe going up tonight that isn't exactly Halloween themed, but it's definitely a fall recipe.  Enjoy the rice krispie pumpkins!

Monday, October 21, 2013

Altering Recipes

Often, when you use a new recipe for the first time it doesn't turn out exactly the way it should.  There's is almost always some little tweak that needs to be made to tune the recipe for your specific oven, the various ingredients that may vary by brand, or the recipe could have the wrong ratios between ingredients.

New bakers are typically hesitant to alter a recipe that they have never used before, the most common excuse is that the baker themselves followed the recipe wrong.  While this is the case sometimes, making small changes to recipes can improve a recipe that just doesn't work completely for you.

I frequently make changes to recipes when needed.  For example, when I made the Langues de Chat, I had to change the amounts of butter and flour so the cookies wouldn't flatten out to the thinness of air.

Basically what the moral or theme of this post is that you shouldn't be afraid to make changes to recipes.  It's usually necessary and makes the recipe taste or look better.  Making little changes to recipes will perfect the recipe for your particular situation.

Hopefully this slightly encouraged and/or helped you!

Halloween Recipes

The next two weeks are going to be Halloween-themed recipes. :)

The first one I intend to make is a Rice Krispie Treat variation.  I should be making it this Wednesday, and the post about it should be up by Friday at the latest.  The recipe takes the traditional Rice Krispie recipe, turns it orange, and shapes it into the familiar shape of a pumpkin that we see all over the place during the months of October and November.

After that I want to make another recipe that is, yet again, pumpkin themed.  This recipe includes dipping Oreos in melted chocolate or almond bark that has been colored, then adding a stem and frosting.

I have plenty of other recipes on my Pinterest Board, so these are only a few.  Leave a comment if you have any ideas or suggestions for what you want to see on my blog, and I will see what I can do.

Caramel Snickerdoodles

I love caramel.  I will eat almost anything with the slightest hint of caramel.  I will make any recipe I come across that has caramel as an ingredient.  I just absolutely love caramel.

So, imagine my excitement when I found a simple recipe that revolves around caramel, literally.  Not only does it have caramel as the main and essential ingredient, it has cinnamon and sugar to make it even sweeter.  This recipe was the epitome of perfection for me.  The only thing that would make it better is chocolate, and I intend to find a way to include that delicacy in the future.

The next greatest thing about this recipe is that it is incredibly simple and doesn't take long to make.  The cook time is less than 15 minutes and the steps to making the Cinnamony-Sugary-Carmally ball of goodness are so easy even the most novice baker could make them perfectly.

Now I should probably actually include the recipe.  The original recipe used a Pillsbury Crescents Seamless Dough Sheet, but I was unable to find this at my local Target.  I ended up using plain old Pillsbury Crescent Rolls, which worked fine for this recipe.  I also could not find plain caramel candies ANYWHERE.  You would think since it's almost Halloween you could find them somewhere, but nope!  I ended up finding them tucked into a corner at Walmart.

Ingredients

Caramel candies (the individually wrapped kind)
Pillsbury Crescents Seamless Dough Sheet (this is where I used the plain Crescent Rolls)
Cinnamon
Sugar

Instructions

First mix the cinnamon and sugar into a mixture that works for your tastes.  You don't need very much of this mixture, about a cup should do.  Then preheat the oven to 350 degrees.

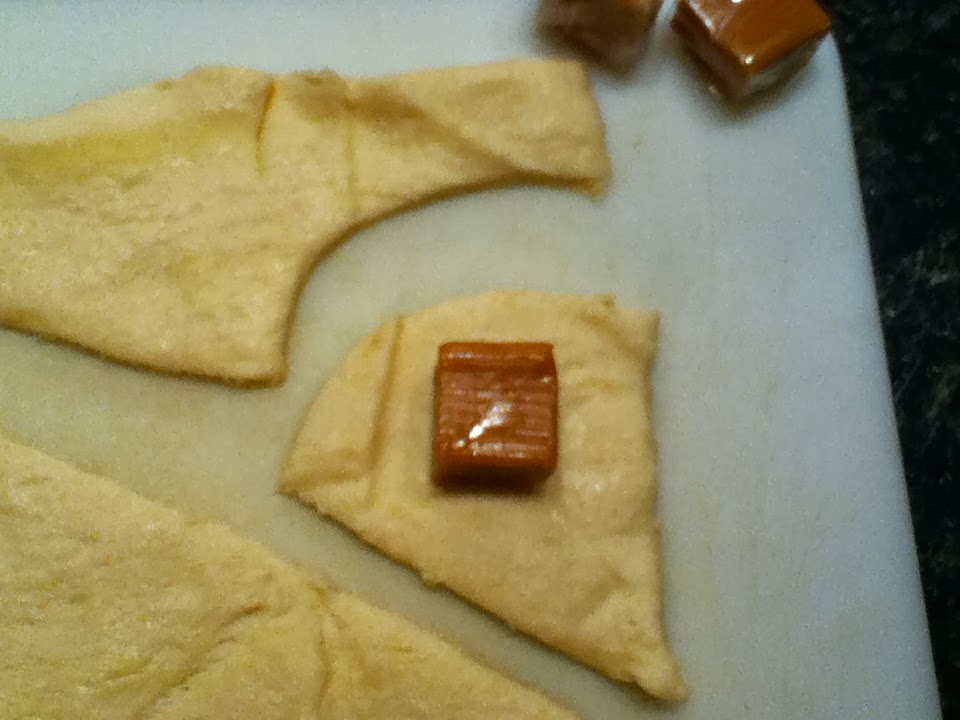
After this open up the crescent rolls and the caramels.  I rolled the dough onto a cutting board and separated the perforated parts, this made it easier to wrap the dough around the caramels.

Each caramel needs about a 2 inch by 2 inch area, or if you want to be less precise (like me) just cut enough dough to fully cover the caramels.

After wrapping the caramel, roll the ball in the cinnamon and sugar, make sure it is fully covered.

Arrange the balls onto a cookie sheet with an inch between each one.

Bake the Caramel Snickerdoodle ball things for 10 - 12 minutes, or until the dough is golden brown.  Some caramel will almost certainly leak, but it's not a big deal.

Make sure to let them cool for five or so minutes so that you don't burn your mouth due to your eagerness.


The original recipe is supposed to make about 20 of these, but I was able to make thirty.  This is most likely because I used two packages of crescent rolls instead of one package of the seamless dough.

These Caramel Snickerdoodles are best when warm, so if you don't eat them right away the microwave them for about 10 to 15 seconds before you eat them.

I tried to get one of those typical glamour shots of food but the caramel just wasn't cooperating so there won't be one of those, but if you want to see what they look like then the original recipe can be found at: http://www.ohbiteit.com/2013/02/caramel-crescent-snickerdoodles.html

Enjoy!!

Monday, October 7, 2013

Conversions

When baking it's helpful to know measurement equivalents and conversions, such as teaspoons to cups, knowing metric conversions is also very helpful for when a recipe has been written by someone from Europe.  I come across metric measurements often when looking for French recipes.

In Europe, liquid measurements are in milliliters, while they are in increments of cups and fluid ounces in the United States.  Dry ingredients are also measured in milligrams, while in the United States we use cups, teaspoons, tablespoons, etc.

Here are a few table with a variety of conversions that are helpful with baking.

Cups and Spoons
Cup
Metric
¼ Cup
60 ml
1/3 Cup
80 ml
½ Cup
125 ml
1 cup
250 ml
Spoon
Metric
¼ teaspoon
1.25 ml
½ teaspoon
2.5 ml
1 teaspoon
5 ml
2 teaspoons
10 ml
1 tablespoon
20 ml

 
Mass
Metric
Imperial
10 g
¼ oz
15 g
½ oz
30 g
1 oz
60 g
2 oz
90 g
3 oz
125 g
4 oz (1/4 lb)
155 g
5 oz
185 g
6 oz
220 g
7 oz
250 g
8 oz (1/2 lb)
280 g
9 oz
315g
10 oz
345 g
11 oz
375 g
12 oz (3/4 lb)
410 g
13 oz
440 g
14 oz
470 g
15 oz
500 g
16 oz (1 lb)
750 g
24 oz (1 ½ lb)
1 kg
32 oz (2 lb)
1.5 kg
48 oz (3 lb)

Liquids
Cup
Metric
Imperial

30 ml
1 fl oz
¼ cup
60 ml
2 fl oz
1/3 cup
80 ml
3 ½ fl oz

100 ml
2 ¾ fl oz
½ cup
125 ml
4 fl oz

150 ml
5 fl oz
¾ cup
180 ml
6 fl oz

200 ml
7 fl oz
1 cup
250 ml
8 ¾ fl oz
1 ¼ cups
310 ml
10 ½ fl oz
1 ½ cups
375 ml
13 fl oz
1 ¾ cups
430 ml
15 fl oz

475 ml
16 fl oz
2 cups
500 ml
17 fl oz
2 ½ cups
625 ml
21 ½ fl oz
3 cups
750 ml
26 fl oz
4 cups
1 L
35 fl oz
5 cups
1.25 L
44 fl oz
6 cups
1.5 L
52 fl oz
8 cups
2 L
70 fl oz
10 cups
2.5 L
88 fl oz


I hope this is helpful!